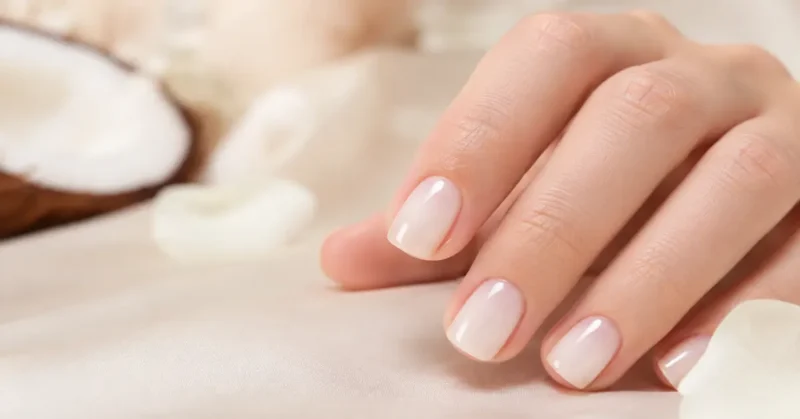
Coconut jelly nails are what happens when two of the easiest-to-wear manicure looks meet: creamy milky-white nails and translucent, glassy jelly polish.
For short nails, that combination works especially well. Instead of covering the nail with a heavy block of bright white, the color stays softly translucent while a glossy top coat gives it that almost wet-looking finish.
And the timing couldn’t be better. Sheer coconut-milk manicures and jelly finishes have both received significant beauty coverage in 2026. British Vogue described coconut milk nails as a sheer wash of white rather than an opaque white manicure, while Harper’s Bazaar highlighted translucent, high-shine jelly polish as part of the broader sheer-nail trend.
If you’re looking for coconut jelly nails short nails inspiration, the ideas below range from simple one-color manicures to micro-French tips, pearl accents, subtle chrome, florals, and vacation-ready nail art.
What Are Coconut Jelly Nails?
Coconut jelly nails usually combine a sheer or semi-sheer creamy white shade with a very glossy finish. The natural nail remains slightly visible instead of disappearing underneath an opaque white polish.
Think of the difference this way:
Classic white nails are crisp and opaque.
Milky nails soften white with a cloudy, creamy appearance.
Jelly nails emphasize translucency and shine.
Coconut jelly nails sit somewhere between milky white and translucent jelly, creating a fresh coconut-milk color with a glass-like surface.
The name also has particularly current relevance. In August 2026, celebrity manicurist Tom Bachik described Anne Hathaway’s short squoval manicure as a “Coconut Jelly Gloss” look, created with a sheer, buildable creamy-white polish.
Why Coconut Jelly Nails Work So Well on Short Nails
Short nails don’t need elaborate artwork to look intentional.
The translucent finish lets some of the natural nail show through, while the shine creates visual dimension without requiring extra length. Short rounded and squoval shapes are particularly compatible with the look; recent 2026 coverage has also highlighted jelly finishes, micro-French tips, and small-scale nail art as strong options for short natural nails.
The trick is proportion.
On very short nails, thin French tips, tiny details, soft gradients, and carefully placed accents tend to leave more breathing room than oversized decorations.
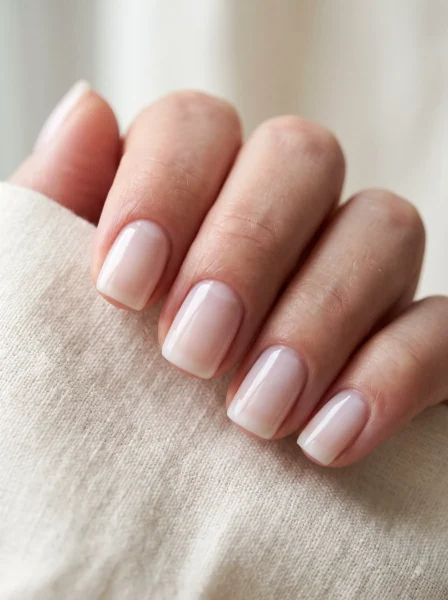
Here are 25 ways to adapt the look.
Classic Coconut Jelly Short Squoval Nails
Start with the version that defines the trend: short squoval nails coated in a translucent coconut-white shade and finished with intense gloss.
Squoval shaping keeps the corners soft while still giving the manicure a clean outline. Ask for a white that’s noticeably milky but not fully opaque.
Two thin coats usually create more dimension than one thick coat. Stop while you can still faintly see the natural nail underneath.
This is one of the easiest versions to wear to work, vacations, weddings, or everyday events.
Ultra-Short Rounded Coconut Milk Nails
If you keep your natural nails close to the fingertip, try a rounded shape instead of forcing a square edge.
Use a soft ivory-white jelly rather than stark white. The combination creates a neat, almost freshly buffed appearance while still looking polished.
Because the design is intentionally simple, cuticle preparation and even application matter more here than nail art.
It’s an especially practical option if you type frequently or prefer low-maintenance nails.
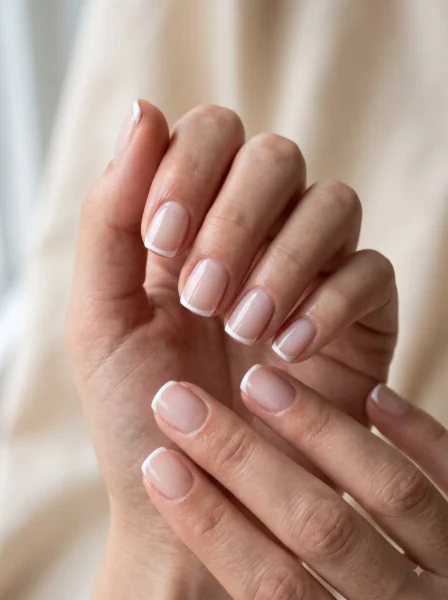
Coconut Jelly Micro-French Nails
A micro-French tip gives the coconut manicure just enough definition.
Begin with a sheer milky base, then paint an extremely narrow opaque-white line along the free edge. Keep the line proportional to the short nail rather than recreating the thicker French tip used on extensions.
Micro-French designs are particularly suitable for short nails because they require very little free edge, and jelly versions have been specifically highlighted among 2026 short-nail designs.
Finish with a glassy top coat.
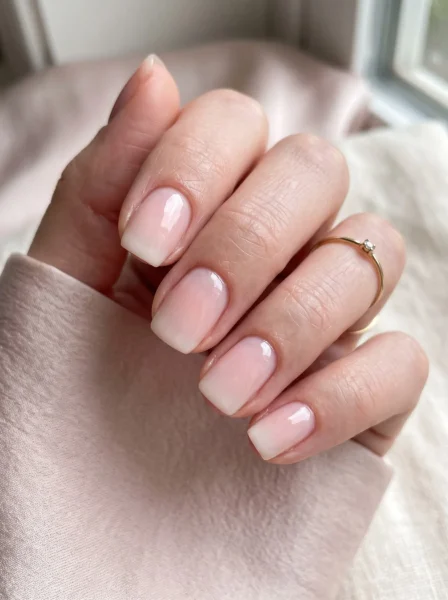
Soft Coconut Jelly Ombré Nails
Instead of a clear division between pink and white, blend a sheer neutral base into coconut white near the tip.
The gradient should be subtle enough that you can’t immediately identify where one shade ends and the other begins.
This works beautifully on short squoval or rounded nails because it visually softens the free edge.
For a salon appointment, ask for a milky white airbrushed ombré with a translucent finish, not an opaque baby-boomer manicure.
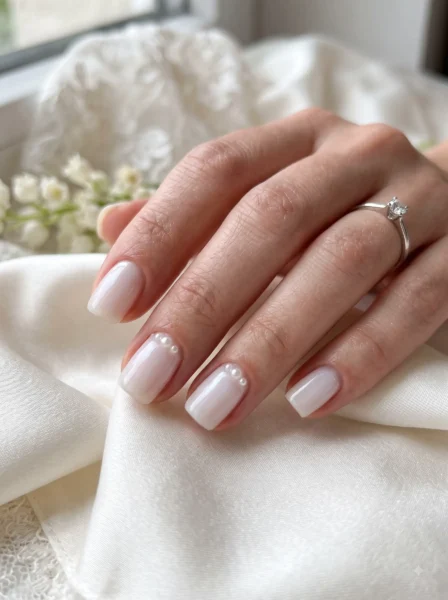
Barely There Coconut Veil Nails
This variation is for anyone who likes nails that almost look unpolished.
Use only one translucent layer of coconut-white jelly followed by a high-gloss top coat.
Your natural nail line and any natural color variation remain visible, but everything looks smoother and brighter.
It’s also a useful option if you normally dislike the heaviness of white nail polish.
Because the coverage is minimal, careful nail preparation makes a noticeable difference.
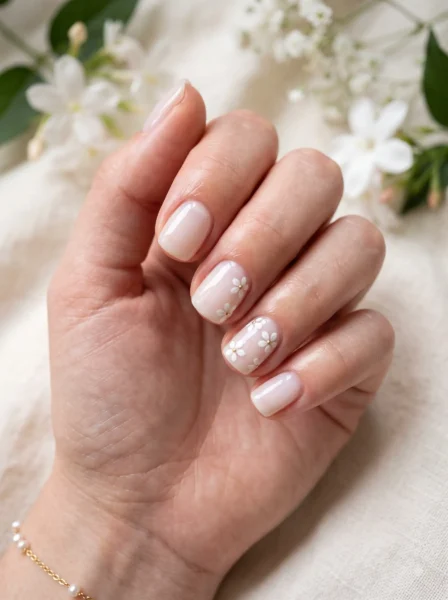
Coconut Jelly Nails With a Blush Pink Base
Add warmth underneath the coconut color with a sheer blush-pink base.
Apply the pink first, followed by a thin veil of translucent white. The result is still recognizably coconut-inspired, but the undertone appears rosier and softer.
This variation can be easier to personalize because you can adjust the pink base to complement your preferred nude shades.
Keep both layers sheer so the manicure doesn’t turn into an opaque pale pink.
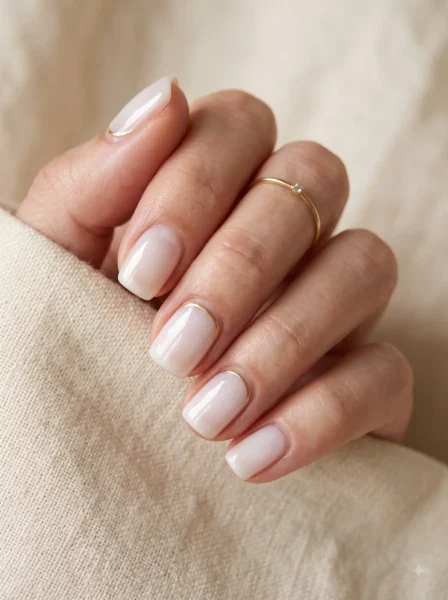
Warm Vanilla Coconut Jelly Nails
Not every coconut manicure needs to be cool white.
Choose a creamy white with a subtle vanilla or ivory undertone for a warmer interpretation.
The change is small, but it can make the manicure feel softer and less stark, especially if bright white polish usually feels too bold against your skin.
A warm coconut shade also transitions easily from late summer into early fall without looking strongly seasonal.
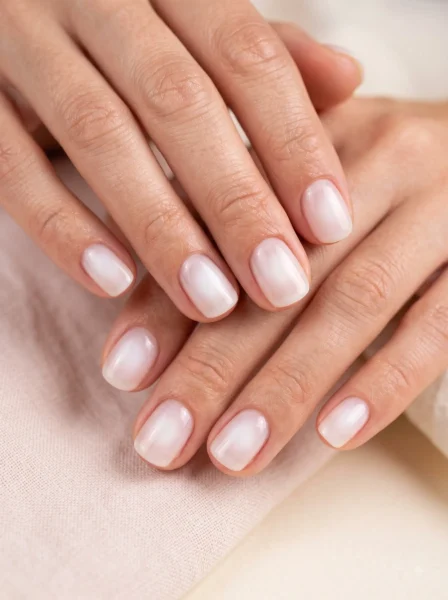
Icy Coconut Jelly Nails
For the opposite effect, choose a cooler milky white with the faintest blue or gray undertone.
Keep the color extremely subtle—the goal isn’t blue nails. Instead, the cooler undertone should make the white appear crisp and almost icy.
This version pairs especially well with silver jewelry and cooler-toned nail art.
Short square or squoval shapes keep the finish modern rather than overly delicate.
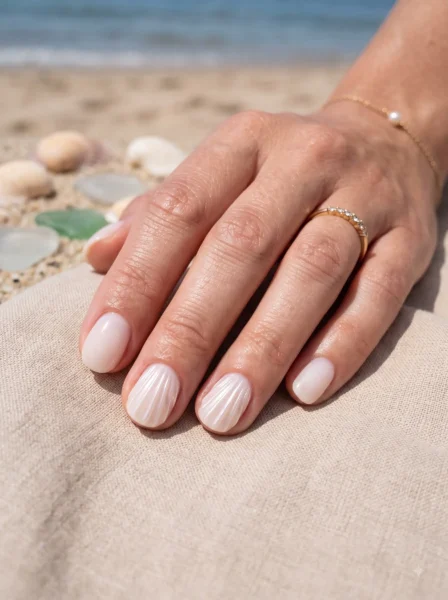
Coconut Jelly Nails With Pearl Glaze
Add a very fine pearl sheen over a translucent coconut base.
The key is restraint. You still want to see the milky jelly underneath instead of covering it with an opaque chrome layer.
Ask for a soft pearl powder or extremely fine shimmer that catches the light only when the nails move.
This is a good choice for brides, engagement photos, graduation, or anyone who wants more dimension without obvious nail art.
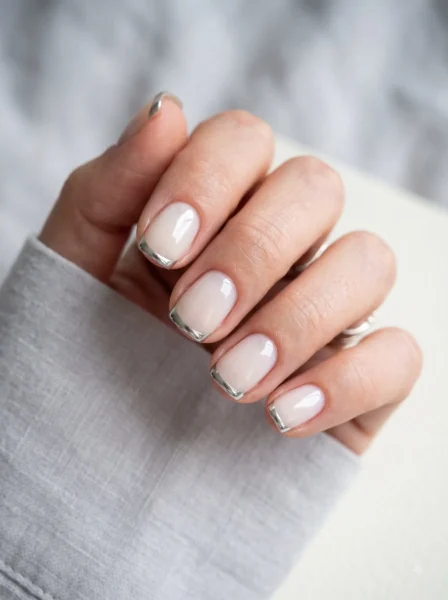
Coconut Jelly Chrome Tips
Keep most of the nail classic and add chrome only along the free edge.
Start with a sheer coconut-white manicure, then apply an ultra-thin pearl or silver chrome French tip.
On short nails, the metallic line should stay narrow.
The contrast between the soft milky base and reflective tip makes this variation noticeably different from a standard French manicure while still remaining wearable.
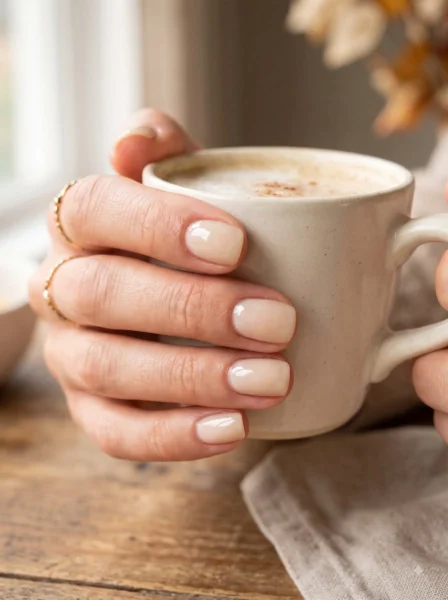
Coconut Jelly Nails With Gold Cuticle Lines
Instead of decorating the tip, move the detail to the bottom of the nail.
Paint a thin curved gold line a few millimeters above the cuticle on one or two accent nails.
The remaining nails stay plain coconut jelly.
This placement works nicely when the nail itself is short because it doesn’t depend on having a long free edge.
Use fine metallic linework rather than chunky glitter if you want the manicure to remain minimal.
Milky Coconut Reverse French Nails
A reverse French manicure defines the half-moon area near the cuticle rather than the tip.
Use a sheer coconut jelly base with a thin opaque-white or soft metallic crescent.
You can apply the crescent to every nail or reserve it for the ring fingers.
Because the detail sits at the base, this design remains visible even on nails that barely extend beyond the fingertip.
Coconut Jelly Nails With Tiny White Dots
Turn a minimalist manicure playful with micro polka dots.
Apply a glossy coconut jelly base, then add tiny opaque-white dots with a dotting tool or fine nail-art brush.
Space them widely rather than covering every millimeter.
Tiny-scale dots are particularly compatible with short nails and are among the miniature nail-art approaches highlighted in 2026 short-nail coverage.
Try dots on two nails and leave the others plain for a cleaner result.
Coconut Jelly Nails With Silver Star Accents
A few tiny metallic stars can change the mood without hiding the translucent base.
Use small silver stars or hand-painted four-point sparkles over short milky nails.
Place each accent slightly differently so the design doesn’t look stamped.
This works especially well for parties and New Year’s manicures, but keeping the stars small makes it wearable beyond holiday season.
Seal decorations carefully beneath top coat so the surface stays smooth.
Coconut Jelly Aura Nails
Place a diffused cloud of soft white or pale blush in the center of each translucent nail.
The edges remain sheer while the middle appears softly illuminated.
Unlike a traditional ombré, the color radiates outward from the center rather than moving vertically from cuticle to tip.
On short nails, keep the aura compact and blurry. A sharply defined circle can make the nail look visually crowded.
Coconut Jelly Cloud Nails
Create delicate cloudy movement within the milky base.
Begin with translucent white, then add irregular wisps of slightly more opaque white before sealing everything beneath another sheer layer.
The result should look soft and diffused rather than marbled with obvious lines.
This technique gives an otherwise simple short manicure more depth while staying within the same coconut-white color family.
Coconut Jelly Marble Nails
For stronger movement, use very thin white marble lines over a jelly base.
Keep most of the nail transparent enough to preserve the signature glossy depth.
Instead of adding marble to all ten nails, consider two accent nails with eight solid coconut jelly nails.
Short square nails work particularly well because the crisp shape contrasts nicely with flowing marble lines.
Coconut Jelly Seashell Accent Nails
Turn the milky base into a subtle beach manicure by adding one seashell-inspired accent.
Use fine raised lines radiating from the base of the nail and finish with a pearl-like sheen.
You don’t need long extensions for this technique. Short seashell designs have appeared prominently in 2026 nail coverage, including versions with ridged texture and pearlescent details.
Keep the remaining nails plain so the texture becomes the focal point.
Coconut Jelly Nails With Mini Pearls
Apply one tiny pearl near the cuticle of each ring finger—or use a single pearl on every nail for a more decorative set.
Avoid clusters of large embellishments on very short nails because they can overpower the translucent manicure.
The contrast works because the pearl repeats the creamy white color while introducing texture.
It’s a particularly pretty option for wedding season without requiring a traditional bridal French manicure.
Coconut Jelly Floral Accent Nails
Paint one or two tiny white tropical-inspired flowers over a sheer milky base.
Keep the petals simple and leave plenty of negative space.
A very small yellow, gold, or pearl center can provide contrast without changing the overall neutral palette.
Coconut-milk manicure inspiration published by InStyle in July 2026 also featured combinations of milky finishes with tropical florals, seashells, French tips, and pearl details.
Coconut Jelly Glitter Speck Nails
Skip traditional dense glitter and use a sparse scattering of tiny reflective flecks.
Silver works for an icy finish, while pale gold warms the manicure.
The important part is maintaining transparency between individual pieces of glitter.
Think of the effect as light catching tiny coconut flakes rather than a full glitter manicure.
One coat of a sparse glitter topper may be enough.
Coconut Jelly Cat-Eye Glow Nails
A soft magnetic shimmer underneath milky white jelly creates much more depth than ordinary glitter.
Choose a pale pearl, silver, or champagne magnetic base. Concentrate the reflective line toward the middle, then soften it beneath translucent white.
The magnetic effect should appear only as the hand moves.
This design requires more technique than a plain jelly manicure, so it may be easier to request at a salon if you’re unfamiliar with magnetic polish.
Coconut Jelly Negative-Space Half Moons
Leave a small semicircle near each cuticle almost clear while coating the rest of the nail in translucent coconut white.
The separation can be completely soft or outlined with a thin white curve.
Because part of the natural nail remains exposed, regrowth can look less obvious than it does with a completely opaque manicure.
This design also gives short nails a clean, graphic element without requiring extra length.
Coconut Latte Jelly Nails
Warm the coconut manicure with a tiny drop of beige or creamy nude.
The color should resemble very diluted latte foam rather than brown polish.
Keep the finish translucent and glossy so the result remains part of the jelly family.
This is an easy variation for late August, early fall, workwear, or anyone who prefers beige neutrals over crisp white.
Pair it with short rounded nails for the softest effect.
Coconut Jelly Mix-and-Match Short Nails
If one design feels too simple, combine several details while keeping the palette controlled.
For example:
- Thumb: plain coconut jelly
- Index: micro-French
- Middle: tiny pearl
- Ring finger: soft ombré
- Pinky: plain glossy jelly
Because every nail stays within white, translucent, pearl, or neutral tones, the manicure still feels connected.
This is one of the best approaches if you want screenshot-worthy nail art without overwhelming short nails.
Best Nail Shapes for Short Coconut Jelly Nails
Squoval
Squoval is probably the easiest match for this manicure. It gives the nail a clean straight edge while rounding the corners enough to soften the overall appearance.
Round
Round nails suit very short natural lengths and work particularly well with plain glossy coconut jelly.
Short Square
Choose square nails if you want micro-French tips, chrome lines, or more graphic nail art. Keep the corners neat to preserve the clean look.
Short Oval
If you have enough natural length to create a gentle taper, a short oval shape gives milky shades a softer appearance.
Don’t force a shape your nails can’t comfortably support. A polished natural shape usually looks better than filing away too much length just to reproduce a reference photo.
How to Ask for Coconut Jelly Nails at a Salon
Showing your nail technician a reference photo is more reliable than relying on the trend name alone.
You can also describe the finish specifically:
“I’d like a short squoval manicure with a sheer milky-white jelly color. I want some translucency rather than solid white, with a very glossy finish.”
Then specify whether you want one, two, or three layers depending on how much of your natural nail you want visible.
If you’re adding artwork, mention the scale. Saying micro-French, tiny pearl accent, or fine chrome line helps distinguish the design from a larger version intended for long extensions.
How to Recreate Coconut Jelly Nails at Home
You don’t need complicated nail art for the classic version.
What You’ll Need
- Nail file
- Base coat
- Sheer or semi-sheer milky-white polish
- Glossy top coat
- Small cleanup brush if needed
- Fine nail-art brush for optional details
Step 1: Shape the Nails
File each nail into a consistent round, squoval, or short-square shape.
Step 2: Prepare the Nail Surface
Remove old polish and make sure the nail surface is clean before applying your base coat.
Step 3: Apply the First Sheer Layer
Use a thin coat rather than trying to create full coverage immediately.
Step 4: Build the Milky Effect
Add another thin coat if you want a cloudier coconut-milk appearance.
Jelly polishes are commonly designed to be buildable, allowing the amount of translucency to change as layers are added.
Step 5: Add Optional Nail Art
Create micro-French lines, dots, flowers, metallic details, or one accent nail.
Step 6: Finish With High Shine
A glossy top coat is important because the jelly effect relies heavily on the reflective surface.
Allow each layer to set according to the instructions for the specific polish system you’re using.
Common Mistakes That Can Ruin the Look
Using an Opaque White Polish
If the first coat completely hides the natural nail, you’ve moved closer to a traditional white manicure.
Choose a formula described as sheer, jelly, translucent, or buildable.
Applying Thick Layers
Several thin layers generally give you more control over translucency than one heavy layer.
Overloading Short Nails With Art
Large flowers, oversized gems, thick French tips, and several competing textures can hide the quality that makes coconut jelly nails attractive in the first place: their soft translucency.
Ignoring the Nail’s Natural Undertone
The same sheer white can look slightly different depending on what shows through underneath. A blush or neutral base can help you adjust the final effect.
Choosing the Reference Photo Only for Color
Look closely at the shape, opacity, finish, and number of accent nails too. Those details often have as much influence on the final manicure as the white shade itself.
How to Keep Coconut Jelly Nails Looking Fresh
Because this style uses a pale, high-gloss finish, small imperfections can become noticeable.
Protect the manicure during chores that expose your hands to repeated water, detergents, or friction. Avoid using the nail edge as a tool to open containers or scrape surfaces.
If you’re using regular polish, refreshing the top coat can help restore shine as the surface begins to dull.
Pay attention to the free edge as well. On short nails, even small shape differences are easier to spot because there isn’t much length to disguise them.
Which Coconut Jelly Look Should You Try?
If you want the lowest-maintenance option, choose classic short squoval or rounded coconut jelly nails.
If you prefer minimal nail art, try a micro-French, gold cuticle line, tiny dots, or one pearl accent.
For a wedding or special event, consider pearl glaze, mini pearls, floral accents, or coconut ombré.
If you want something trendier and more dimensional, choose aura, cat-eye glow, seashell texture, or subtle chrome.
And if you’re unsure, start simple. The appeal of coconut jelly nails comes primarily from the milky translucency and glossy finish. Nail art is optional.
FAQ
Are coconut jelly nails good for short nails?
Yes. Coconut jelly manicures work particularly well on short nails because the sheer milky finish doesn’t require extra length to create visual interest. Round, squoval, short-square, and short-oval shapes can all work. For very short nails, keep decorative elements small—micro-French tips, tiny dots, delicate metallic lines, and single pearl accents are easier to balance than oversized art.
What color are coconut jelly nails?
Coconut jelly nails are usually a translucent or semi-sheer creamy white. They shouldn’t look as solid as correction-fluid white or as transparent as clear polish. Depending on the variation, the white can lean slightly warm, cool, pink, or ivory. The defining characteristics are the milky appearance, some degree of translucency, and a glossy finish.
What’s the difference between coconut milk nails and coconut jelly nails?
The terms overlap considerably, but “jelly” puts more emphasis on translucency and glass-like shine. Coconut milk nails are generally associated with a soft milky-white color, while coconut jelly nails combine that creamy shade with the transparent, high-gloss qualities associated with jelly polish. In practice, many manicures can fit both descriptions.
How many coats do you need for coconut jelly nails?
It depends on the polish and how translucent you want the manicure. Start with one thin coat and assess the coverage before adding another. Two thin coats often create a balanced milky effect, while an additional coat can make the color more noticeable. Avoid automatically adding layers if you’ve already reached the opacity you want.
Can I get coconut jelly nails with regular nail polish?
Yes. The look isn’t limited to one manicure system. The important part is choosing a sheer or buildable milky-white formula and finishing it with strong gloss. Regular polish can create the aesthetic at home, while salons may offer comparable shades in gel or other manicure systems.
What nail shape looks best with coconut jelly polish?
Short squoval and rounded nails are excellent starting points because they complement the soft, minimal appearance. Short square nails work well for crisp French tips and line art, while short oval nails can create a slightly more elongated appearance. The best shape ultimately depends on your natural nail structure and preferred maintenance level.
Are coconut jelly nails only for summer?
No. The coconut name naturally suits summer, but the actual color is a neutral sheer white, so it can transition into other seasons. Keep it plain for work or fall, add pearls for wedding season, fine gold details for holidays, or chrome accents for New Year’s Eve. The base manicure itself isn’t tied to one specific month.

I’m Ava Thompson, a certified nail artist and beauty educator from Los Angeles, CA. After nearly a decade working at high-end salons, I became obsessed with helping women recreate salon-quality nails at home. I’ve personally tested hundreds of tools and polishes — drugstore and professional grade — so every tutorial I write is based on real experience, not just pretty pictures. My goal at Dhamaka Mirchi is simple: help you nail it on the first try, without spending a fortune.